Tuesday, 28 December 2010
AfterEffects, testing out ideas
Just an idea, pen clicking and revealing all of the word. Didn't quite work, the click's speed and movement needed to be perfect in order to communicate it better. It didn't fit right.
This doesn't relate to trying to communicate click, just shows experimentation with effects available on AfterEffects. It's just rotation.
Just experimenting with the 'shatter' effect.
getting used to AfterEffects,
Untitled .
I went with the idea of each individual letter falling and then bouncing once it hit the floor. However, when I watched it over and over again I realised that it did a better job communicating fall, then bounce. I can't rely on what the letters spell out to help communicate it. Also, when adding the video to the render que it didn't finalise properly so it cut off the last second of the animation.
Untitled .
This was an idea where I imagined the letters as little animals of some sort, just.. bouncing around? But the idea was a little dull and I felt it didn't communicate 'bounce' that well so, I scratched it.
Untitled .
I quite liked this idea, the large 'B' made my screen shot that little more interesting looking, and I also liked how the letters were all jumbled up so they did almost become shapes, the idea of a pinball type machine seems easier to communicate.
Untitled .
This was a simple idea, nothing special
Untitled .
I liked this idea of a computer screen, the word 'click' being typed out, the keyboard being typed, clicked. I also used one of the methods on AfterEffects, where when you add a key frame you also add one letter, so it gives that look as if it is being typed.
This was quite simple, it was just a matter of stretching the word. I used the transformation effects that are available on AfterEffects, including skew, perspective etc...
This was just testing out using the opacity effect, I also added the effect to each individual letter, so each letter fades out (or in) separately.
This communicates 'stretch' quite bluntly, I just used the scale effects, widening and compressing the word, to make it look as if it is being stretched.
chewing gum stretch
I asked Mike if I was able to create my chewing gum idea, it basically uses a combination of masks, layers and outlines around the type (which is pasted from illustrator). It enables me to individually choose anchor points and move them as an animation. I wanted to use them to stretch the word as if it was sticky, a bit like chewing gum.
This was just a rough video, as I got used to using the anchor points and using the layers/masks,
This was my chewing gum idea, finished.. sort of. I wasn't happy with it, I think the imagery I had in mind for this short animation didn't match up to the one I produced. It looks a bit too harsh and straight edged. I could visualise and communicate it better through Photoshop, but it was a bit harder on Illustrator.
development
chewing gum stretch
This was an idea I had to communicate stretch, I imagined it as a piece of chewing gum falling on the floor and then as if someone then stood on it, causing it to stretch off the ground being attached to the shoe.
button click
Once again, this idea emerged from using imagery. I could communicate click as being a pen top, clicking up and down?
Tuesday, 7 December 2010
after effects, playing with words (very basic)
second test video, using AfterEffects
Saturday, 4 December 2010
Wednesday, 1 December 2010
After effects, induction 1
First introduction into the software 'After effects'
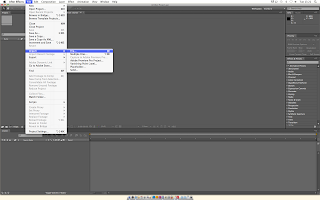
I have used video editing software before, but only the basics, Final Cut has a similar layout to After effects. Also, like InDesign, images have to be imported:

If you want to start working using After effects, you have to open a new composition to begin animating:
PAL is a UK/American setting used for video/film/moving image, so when choosing appropriate settings for your new composition you have to choose PAL related settings. Also, because we will be using still images/photoshop images, they will be square pixels so we choose widescreen and square pixels.
Here you can adjust start and finish time (duration), and the colour of the background screen you would like:
To insert a shape to begin a moving image:
Options to change different features of the shape, colour, size etc...
You can adjust the duration the shape appears on the screen, the red bar that runs along the bottom can be shortened by hovering over the edge of it:
By adding more layers of shapes, having them appear at the right time etc.. you can create a moving image. This is a very simple one where the squares simply move along the page:
If your sequence is taking a while to render, (to render click the button on the very right where the play/pause buttons are), then you can lower the resolution:
Including text is done the same way as image:
I have changed the background colour and colour of the shape. Here is how you can make a shape move following a certain path. Click on the arrow where the shape's properties are, then click position, you can then drag the shape to follow a path:
Like Illustrator, there are anchor points you can adjust to insert a curve into the path:
Subscribe to:
Comments (Atom)


